How to Change a Diaper
While changing a diaper is one of the main acts parents engages in, many aren’t quite sure exactly how to change a diaper. While most parents figure out diaper changing dos and don'ts through trial and error, we thought it would be helpful to collect all the helpful information about diaper changes in one place. This insight can shorten your learning curve and help you skip right to the part where you’re a pro at getting that fresh diaper on your baby.
To get you started, here’s a general outline of how to change a stinky diaper:
- Wash your hands. Ensure you’re not exposing your baby to any germs or chemicals by thoroughly washing your hands before beginning the diaper change.
- Gather your supplies. Before you place baby on the changing table, collect all the supplies you’ll need so they’re within arm’s reach.
- Remove any hazards from the area. After collecting your supplies, ensure there’s nothing dangerous baby could get their little hands on while lying on the changing table.
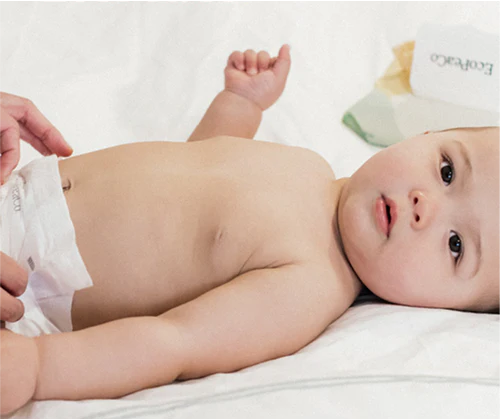
- Put baby on changing table. Baby should be lying on their back.
- Remove any clothes blocking the diaper. If baby is wearing a onesie, unsnap the bottom and fold it up so it’s away from the diaper.
- Unfasten the tabs of the diaper.
- Fold the clean, outer portion of the diaper under baby’s back. For a poopy diaper, use the top half of the diaper to wipe the poop back towards the lower portion of the diaper.
- Wipe off any urine and fecal matter. Use a baby wipe to thoroughly wipe away all urine and fecal matter. Be sure to check baby’s back, as some of the contents of the diaper might have slipped up and out.
- Remove the diaper. Gently lift baby’s ankles up and pull the diaper off.
- Put on a new diaper. With baby’s ankles still slightly elevated, slip the new diaper under their bottom. The portion with the tabs goes in the back, under baby.
Regarding how to change a newborn diaper, if the umbilical cord is still attached, fold the front portion of the diaper down so it’s just under the stump.
- Pat dry and apply any needed ointments. To ensure there’s no residual moisture, pat baby dry with a washcloth, and apply ointments, or other remedies, if they have a diaper rash.
- Fasten the diaper. Finally, pull open the tabs and affix them to the front of the diaper. You want the fit to be snug enough to prevent leaks, but not so tight that it causes irritation. You should be able to fit about two fingers into the waistband of the diaper.
- Throw away the old diaper. Roll the diaper into a ball and hold in place with the tabs. Then, place the diaper in the diaper pail.
- Dress baby. If the clothes baby was wearing before the change are dirty, put them in new clothes.
- Wash your hands. Ensure all urine and fecal matter is removed from your hands by giving them a good scrub.
Safety Note: Never leave your baby alone on the changing table. Turning away for even a moment could lead to them rolling off.
What Do You Need to Change a Baby’s Diaper
There are a few essentials you’ll need when changing baby’s diapers. Always keep the changing table and diaper bag stocked with these items.
- Diapers. While you’ll only need one diaper at a time, it’s wise to always have a good supply so you never find yourself without a diaper. You might also want to buy one package of the next size up so you’re ready when baby outgrows their current size.
- Baby wipes. Wipes are needed to clean urine and fecal matter off the baby. It’s best to use wipes that are hypoallergenic, antibacterial, and fragrance-free. A clean, washcloth moistened with warm water can also work.
- Diaper rash remedy. If your baby develops a diaper rash you’ll want a diaper rash cream, coconut oil, or another remedy at the ready.
- Diaper changing pad. Regardless of where you’re changing baby it’s wise to have a pad with elevated sides, which can help prevent baby from rolling off. Most pads are waterproof and can be easily wiped clean. Many also come with a removal cover that can be washed.
- Water-proof mat. If the changing pad isn’t handy, you can place baby on a water-proof mat, or even a towel.
- Diaper pail. A diaper pail is the ideal place to store soiled diapers, as they can often contain aromas.
Where to Change Your Baby’s Diaper
The go-to place to change a diaper is a changing table, as it’s a space where you can store all your diaper changing materials. In addition, most changing tables have raised sides that help to minimize the chance of the baby rolling off.
However, if you don’t have a good place for a changing table in your home, or you’re out of the house when the baby needs a change, almost any flat service will do. Many people change their baby on beds, in the crib, or even the back of the car. All you need is a mat, and your diaper bag with the supplies.
As you’re searching for a good space, ensure there are no hazards in the area. And of course, always keep one hand on baby during the change.
Changing a Baby Girl’s Diaper
In addition to following the steps in our detailed diaper changing guide above, be sure to wipe downward from front to back when changing a baby girl’s diaper. Doing so can help prevent the baby from developing a urinary tract infection, UTI, or other type of infection that can occur from wiping back to front.
Changing a Baby Boy’s Diaper
When changing the diaper of a baby boy, cover the penis with a baby wipe or wash cloth after removing the soiled diaper. This will help to contain the urine if they begin peeing. In addition, gently clean around the penis and scrotum, and help prevent leaks by pointing the penis down when putting on the new diaper.
How Often Should You Change a Diaper?
It’s ideal to change your baby’s diaper as soon as possible after each bowel movement. This helps prevent the development of rashes from diapers, as it minimizes the time baby’s skin is exposed to fecal matter.
Wet diapers should also be changed soon after you notice the moisture. Just like a poopy diaper, the less time baby’s skin is exposed to urine, the less of a chance that they’ll develop a rash.
Note that newborns typically need around 10 diaper changes every day, and using a diaper brand that includes wetness indicators can make it easy to determine when it is time for a diaper change.
Tip: To ensure you always have enough diapers, you can sign up for a subscription service, like the bamboo diaper subscription from Eco Pea.
How Do You Know When to Change a Baby’s Diaper?
While you know that you want to change your baby’s diaper soon after it’s soiled, it can sometimes be tricky to figure out when that is.
Following are some telltale signs that your baby is ready for a new diaper:
- The wetness indicator is indicating moisture. Many diapers, like those from Eco Pea, have a wetness indicator that turns a certain color when exposed to moisture.
- You see or smell poop.
- If you stick a finger in baby’s diaper and feel moisture, they’ve likely peed.
- When baby’s diaper is sagging, or the bottom portion seems bulky, they probably have a dirty diaper.
While diaper changing might initially feel like a perplexing, full-time job, you’ll eventually get the hang of it. And when this happens, the many diaper changes you perform each day will start to feel like second nature. If you're feeling overwhelmed right now, don't worry too much about it as everyone is learning together, and with these steps you'll be well on your way to writing your own comprehensive guide on how to change a diaper!


